Gearbox and Prop shaft Removal
| Remove Upper Gearbox Securing Bolts | ||
| |
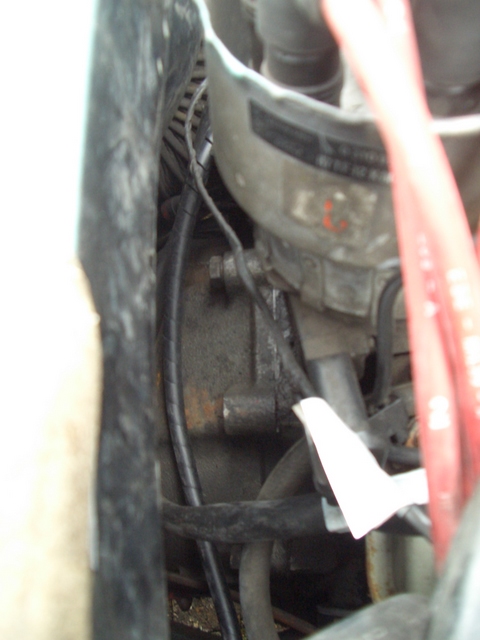
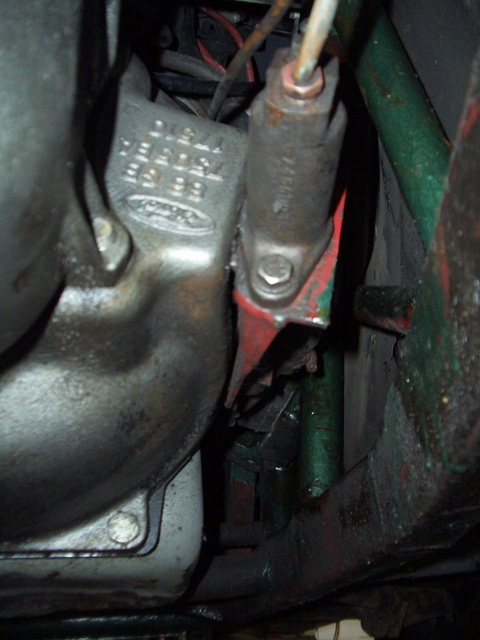
Remove the Exhaust from the car before doing anything else. Next undo these two bolts between the gearbox and the engine (accessed from the drivers side behind and below the distributor and also the next one in each direction as you can't get any leverage from below and you won't find it easy to get to these once the car is on axle stands | |
| View | ||
| Exhaust Off | ||
 |
I removed the whole exhaust from the end of the manifolds as seen here | |
| View | ||
| Differential Flange | ||
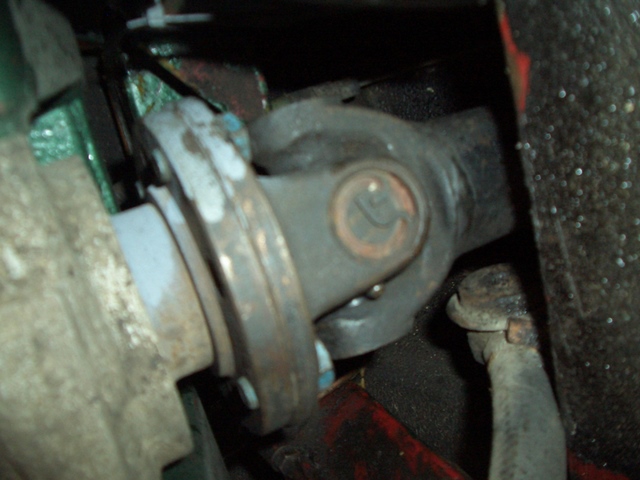 |
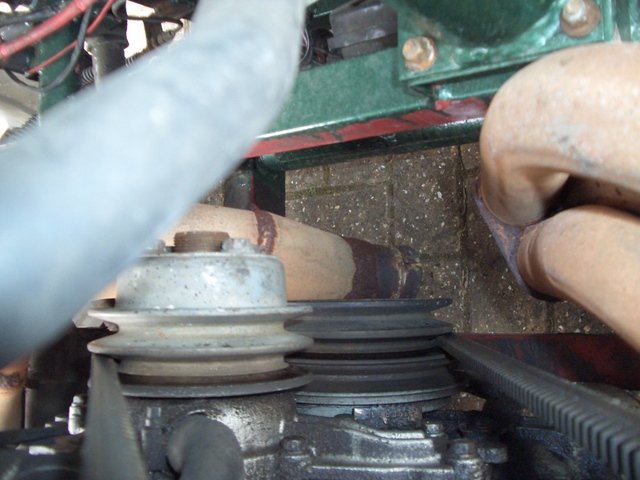
Next mark the final drive to Prop shaft flange to get correct alignment on replacement and undo the four locktited bolts. You will need to lock the prop shaft with a screwdriver or similar through one of the UJs. Once all bolts have been removed push the prop shaft forward to clear the diff flange central nut and drop the prop onto the chassis. | |
| View | ||
| Diff Mounting Bracket 1 | ||
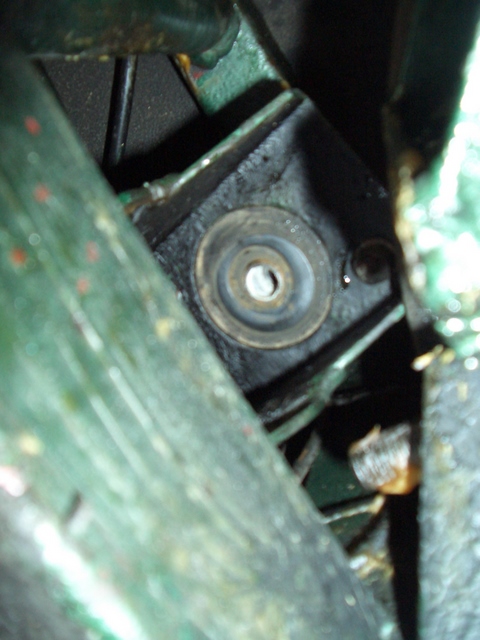 |
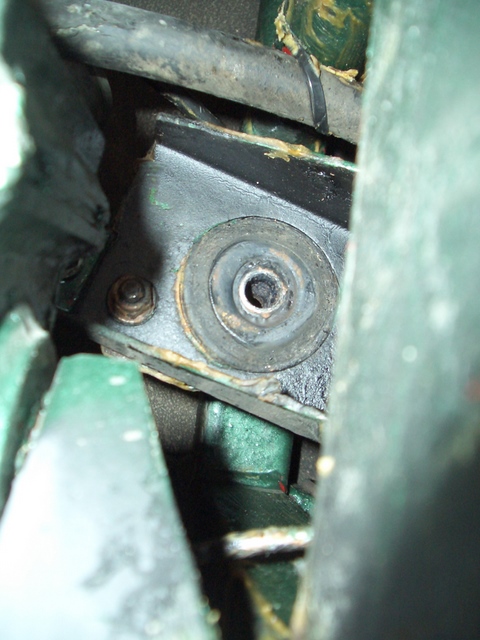
Next remove the rear diff support bracket mounting bush bolts, seen from below on either side of the diff (they were 17mm bolts on mine). This one is to passenger side the next picture is the drivers side | |
| View | ||
| Diff Mounting Bracket 2 | ||
 |
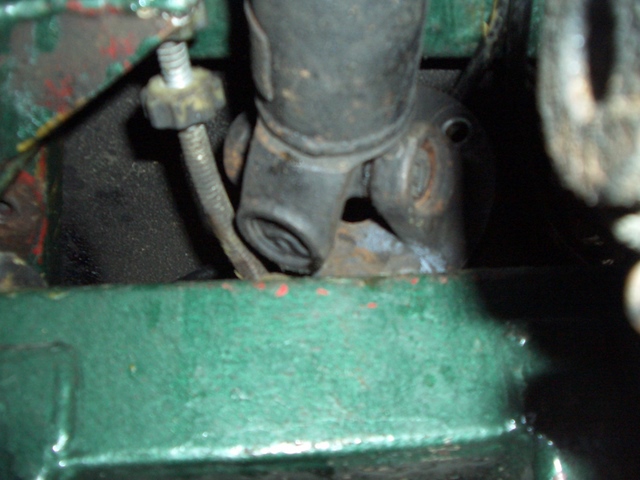
This is the drivers side mounting bush, once loose allow the diff and mount to drop approximately 3 inches until in contact with the chassis | |
| View | ||
| Prop Shaft Withdrawal 1 | ||
 |
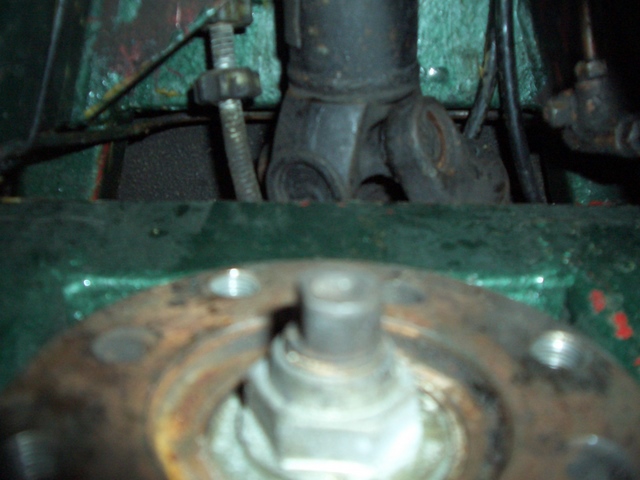
The prop shaft then slots up above the differential mount like this, or | |
| View | ||
| Prop Shaft Withdrawal 2 | ||
 |
This, the prop will then move backward enough the clear the gearbox output shaft and then drop through the chassis and out | |
| View | ||
| Electrical Disconnections | ||
 |
Next remove the gear lever and rubber gaiter and also disconnect the speedo and reversing light electrics. I used some tape to protect the speedo wiring during the huffing and puffing and wiggling section later as I'd heard of plenty of tales of damaging this and they are as rare as rocking horse shite. | |
| View | ||
| Slave Cylinder Removal | ||
 |
Then unbolt and remove the clutch slave cylinder from the gearbox. | |
| View | ||
| Starter Motor Removal | ||
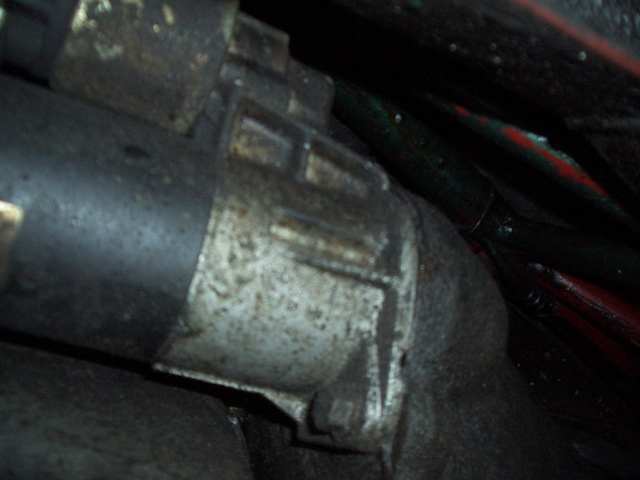 |
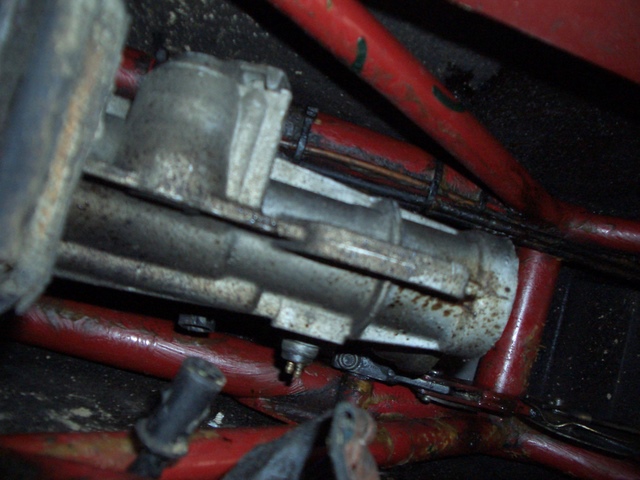
Now disconnect the battery earth and then undo and withdraw the starter motor - this has two bolts one easily accessible from below (and visible) one in the diametrically opposite side but very inaccessible and bloody difficult to get any torque on (I had to use 3 extension pieces end and a breaker bar). Support the starter motor on the chassis to prevent stressing the cables. | |
| View | ||
| Gearbox Securing Bolt Removal | ||
| |
Now undo the rest of the securing bolts for the gearbox to engine (the Haynes manual said there are 6 - mine had 9 in total (including the 4 removed at step 1, but not including starter motor bolts). They are all 17mm. | |
| View | ||
| Gearbox Mount Removal | ||
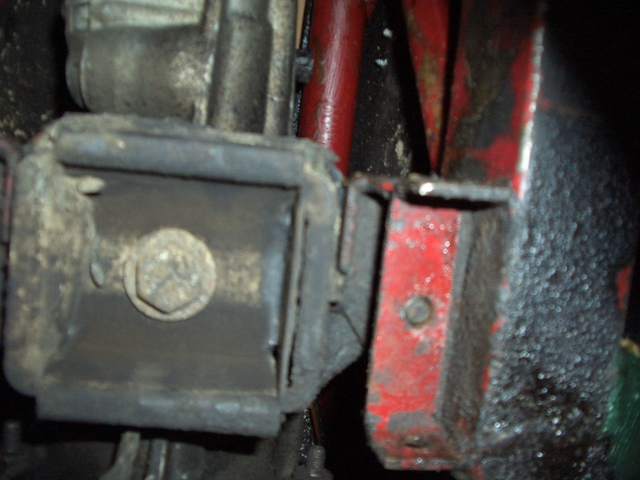 |
Now undo the 6x13mm bolts securing the gearbox mount and joining the two parts of the chassis together and remove. It goes in between the red part seen here and a similar bracket on the other side (sorry no photo - I forgot to take one before removing it). Once the 6 bolts are undone it just pulls down and out. Then remove the mounting bush bolt shown here, push up the rear of the box and remove the rubber mount. Then use a small piece of wood between the chassis rails (or an assistant) to support the rear of the box. The best bet is an assistant as he can slowly lower the rear of the box through the chassis as the engine tilts reducing any stresses imposed by the tilting of the engine. Other option is to use a jack and sequentially tilt the engine and lower the back of the box in stages. | |
| View | ||
| Tilt The Engine | ||
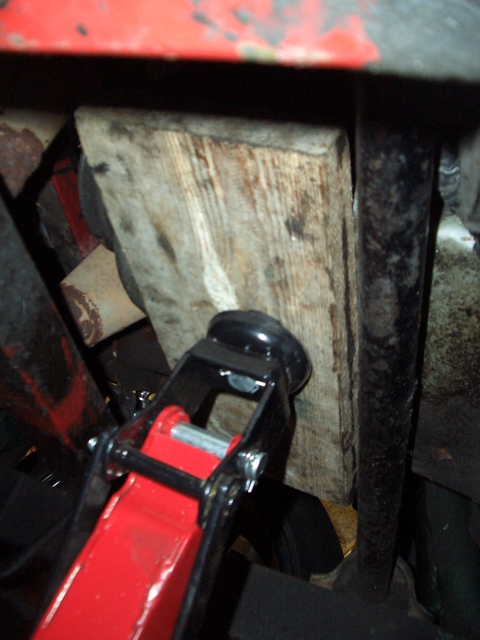 |
Next remove the distributor cap and the oil filler cap from in the engine bay. Place a jack under the sump with a spacer/load spreader (also aka lump of wood) and lift the front of the engine so it starts to tilt back as far as possible. You will need to get it until the nearside rocker cover actually touches the body shell bulkhead or you won't clear the box webs and the chassis brackets shown in the earlier picture when attempting to withdraw the box. | |
| View | ||
| Withdraw The Box | ||
 |
Now get under the car and supporting the front and rear of the box, huff and puff like a good'un and pull the box rear wards until the input shaft clears the clutch. The box will partially drop as soon as the locating lugs clear supporting the box at this time is vital to avoid damage. Then as the input shaft clears fully slowly lower the box to the ground and you get the view in this picture. Then you just need to get the box out from under the car (I found this easier said than done as I hadn't got the car high enough to clear the bell housing at first. | |
| View | ||
| Clutch Removal and Spigot Bearing Removal | ||
 |
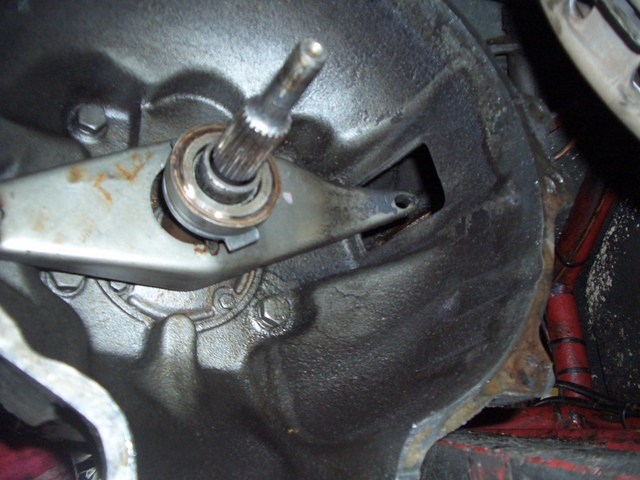
To remove the clutch loosen each of the screws (visible on the outer edge of the flywheel) 2 turns each rotating the engine to provide access. Gradually repeat until all pressure from the pressure plate has dissipated. Next remove the screws completely and then using a screwdriver carefully prise pressure plate away from flywheel. Clutch and pressure plate will drop and are heavy. You can now see the spigot bearing and flywheel securing bolts. The picture shows my home made Spigot Bearing removal tool. The methods of making it and removing the bearing is shown in the next two picture stories | |
| View | ||
| Spigot Bearing Removal Tool | ||
 |
First I tried to get the spigot bearing out using the hydraulic method described to me on Pistonheads and by my indi garage friend - but had no joy. It may work for you though so here is description. Pack behind bearing with grease ensuring there are no air bubbles. Then use a tight fitting bolt or metal bar and push it through the spigot bearing until it is hard up against the grease. Then get a bloody big hammer and hit the bar/bolt hard and the pressure on the grease forces the bearing out. A second method described to me was to chisel or grind out the bearing. However I didn't want to take a chisel or dremel to the crank so thought I'd look for a proper puller. They cost over £80, therefore thought how do I do this cheaper - the proper tools were basically a cone pulled up through an expanding collar, a bit like a frame anchor, and then a slide hammer attached to the end. So I thought I am sure I could make one of those. So I bought an M8 and an M10 frame anchor. |
|
| View | ||
| Spigot Bearing Removal | ||
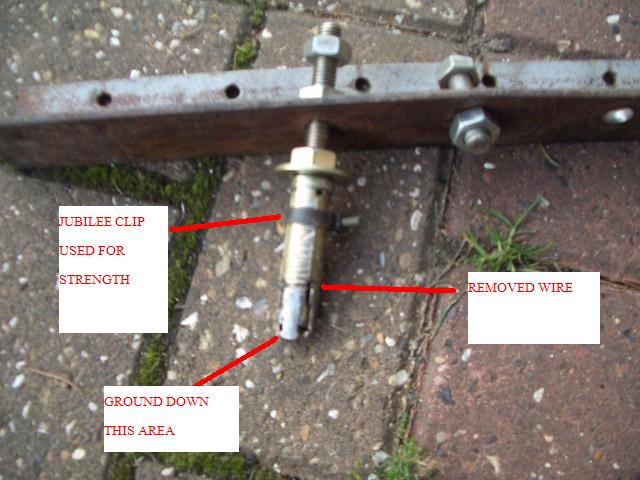 |
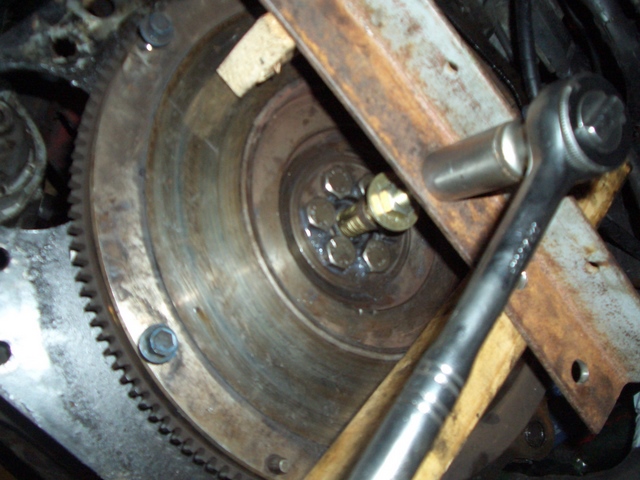
The M8 was too small and sods law the M10 was too big, so used a grinder to reduce the size of the cone and shave off the outer edges of the surrounding bits of the frame anchor until it fitted through the bearing (just visible in the picture). I then removed the wire bit that holds it all together and replaced it with a jubilee clip for strength (and because the wire got in the way) I then tightened down until the frame anchor was well wedged in the bearing, put a metal strong back over the bolt part of the anchor and then using packer pieces and another nut wound out the bearing. Pleased as punch and no risk of damaging the crankshaft. My "tool" is available for anyone else who wants to use it. Just email me, but it cost me a grand total of £1.25 and an hours work (mainly thinking and pondering time) |
|
| View | ||
| Putting It Back Together | ||
| |
Apologies for no pictures, but here are the pitfalls I encountered: |
|
|
||